LightBurn access in remote desktop to prepare your laser cuts
To enable users to prepare their laser cutting jobs in advance without blocking the computer that controls the laser cutter, we provide access to a Windows machine for remote access. This allows you to use LightBurn remotely to prepare your laser cutting jobs in advance.
Connecting to the server
To be able to connect to the server, you need to be connected to the EPFL network (either locally or over VPN). You can then use any RDP client to connect to it using your EPFL credentials (see https://make.epfl.ch/remote-pc for details about the connection procedure). The server to connect to is dllstigepc22.
- From a Windows client, there is no need to install any software, as the client is part of Windows. Just download this RemoteApp connection profile: lightburn_remote.rdp, open it, and confirm you want to connect. This will allow you to use LightBurn remotely almost as if it was on your computer, including access to your local disks.
- From a MacOS client, install the Windows App (previously Microsoft Remote Desktop), and use the same RepoteApp profile as for Windows.
- From Linux, you can use this Remmina profile to connect to the remote server and share your local disks so you can open and save files to your local PC: lightburn_server.remmina. The Remmina client is installed by default on most distributions.
In all cases, you will need to log in with your EPFL account. Your username is INTRANET\username (alternatively, your EPFL e-mail address should also work as username), and your password is the standard EPFL one.
Using LightBurn remotely
If you are using the RemoteApp profile, after a short connection phase you will directly see the LightBurn window appearing on your PC. If you connect over regular remote desktop, once you are connected to the remote server, simply double-click on the LightBurn icon on the desktop to open LightBurn.
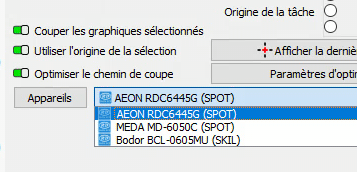
The first thing to do before starting to import your DXF or SVG files is to select the laser cutter you are going to use:
This is important because the materials library, machine configuration and plate size are not the same. Once this is done, simply use LightBurn as you would use it on the laser PC. To transfer files from/to the remote computer, see the next section.
Please save your work regularly when you work remotely. Inactive sessions will be disconnected within one hour, and disconnected sessions will be terminated within 15 minutes.
Ideally, always save your work to your EPFL My Documents folder, as it has snapshots and backups, and is not erased at any time, unlike the local disk of the remote PC. Or at least, save on the local drive of your computer.
Transferring files
There are several options to transfer files from/to the remote computer.
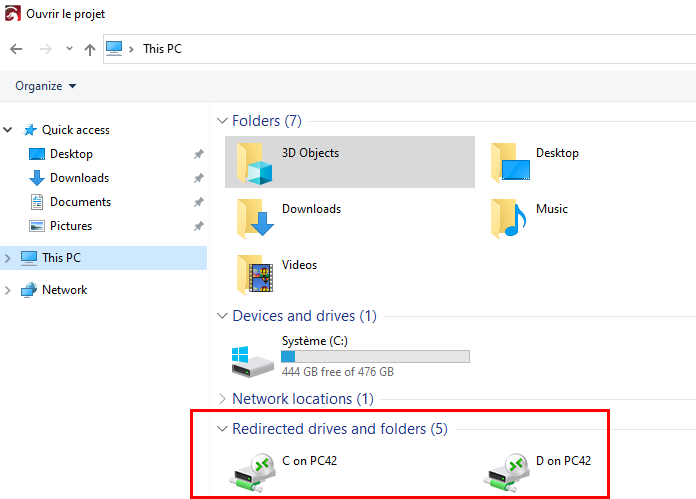
- If you used the provided connection profile, you will directly see the local disks of your PC on the remote one:
- From Windows and MacOS clients you can simply copy-paste files between the local and the remote PC as you would do between two directories on your local PC.
- You can also access your EPFL network My Documents folder from the remote PC.
To save your LightBurn project to use on the laser PC, you can either save it to the EPFL My Documents folder and load it from there once you are on the laser PC, or save it to a USB stick and bring it with you. For the SKIL laser cutter, only the latter option will work, as the computer is not connected to the network.
Finalizing the cut
To actually cut your parts, you will need to physically connect to the PC controlling the laser, import your project (either from a USB drive or from your networked My Documents folder), and enjoy your cut and the sweet smell of MDF burning.

